


2 Ways to Remove OneDrive from File Explorer and Fully Get Rid of It
As Microsoft's storage service for hosting files in the "cloud", OneDrive is a good helper for many Windows users who use multiple devices. It can easily store, sync and share various types of files. But OneDrive is installed in Windows 10 by default, which ignores the feelings of those who don't like it. It appears permanently in the File Explorer sidebar, even after you have unlinked your Microsoft account from OneDrive.
If you have no interest in OneDrive, here is how to remove it from File Explorer and totally disable OneDrive on your computer. Follow the below two ways to remove OneDrive from Quick Access in File Explorer of different Windows versions.
1. Remove OneDrive from File Explorer (Windows 10 Home)
If you're using Windows 10 Home, this change needs to be made in the Windows Registry. This is actually a simple hack so follow the steps carefully to avoid any unnecessary troubles on your computer.

Step 1: Press Win + R in the keyboard to open the Run command.
Step 2: Type "Regedit" in the blank.
Step 3: Click OK or hit Enter.
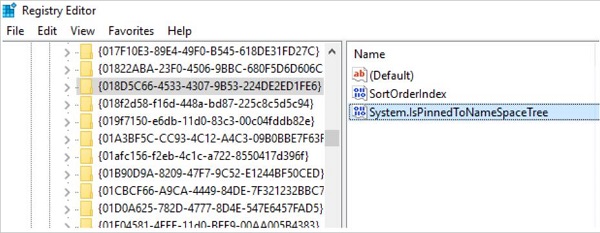
Step 4: In the Windows Registry Editor, use the left sidebar to navigate to the following location:
HKEY_CLASSES_ROOT\CLSID\{018D5C66-4533-4307-9B53-224DE2ED1FE6}
Tip: If you have trouble searching for the target location, you can head to Edit > Find in the Windows Registry menu, and then type CLSID. Now the search scope becomes much smaller and you'll find the target more easily.
Step 5: Double-click System.IsPinnedToNameSpaceTree in the right panel.
Step 6: Change the Value data to 0.
Step 7: Click OK.
Tip: If you're using a 64-bit version of Windows, it's also necessary for you to navigate to the following location in the left sidebar: HKEY_CLASSES_ROOT\Wow6432Node\CLSID\{018D5C66-4533-4307-9B53-224DE2ED1FE6}. Then follow Step 5 to Step 7.
Step 8: Close the Registry Editor.
Now OneDrive will be removed from your Windows completely. If it doesn't work, reboot your computer.
2. Remove OneDrive from File Explorer (Windows 10 Professional, Enterprise or Education)
If you're using Windows 10 Professional, Enterprise or Education, you need to get rid of OneDrive in Local Group Policy Editor. Local Group Policy Editor lets you control the sign-in or shut down processes, the settings and the apps that users are allowed to use and change in Windows. Here we go.
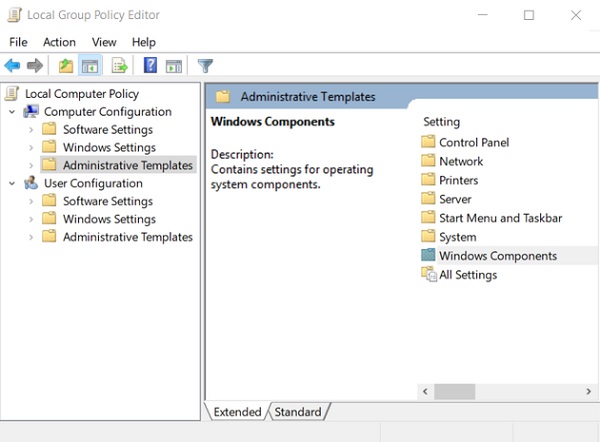
Step 1: Hit Start, type gpedit.msc and press Enter. Now the Local Group Policy Editor is launched.
Step 2: Head to Computer Configuration > Administrative Templates > Windows Components > OneDrive.
Step 3: Double-click the "Prevent the usage of OneDrive for file storage" in the setting list. Tick Enabled and click OK.
Now OneDrive is completely disabled and hidden from File Explorer. You won't be able to launch or access to it.