How to Change Time on Computer (Windows 10)
Some people find that the date and time are wrong after they installed the new version of Windows 10. If you are experiencing the similar problem and searching for the methods of how to change the time on Windows 10, this how-to post will show you the answers you want.
Change Time and Date on Windows
Windows itself offers the function to change time and date on settings.
Step 1: Click on the time and date at the bottom right of the screen. A calendar will pop up. Click "Date and time settings".
Step 2: In the new dialog box, toggle off the options of "Set time automatically" and "Set time zone automatically".
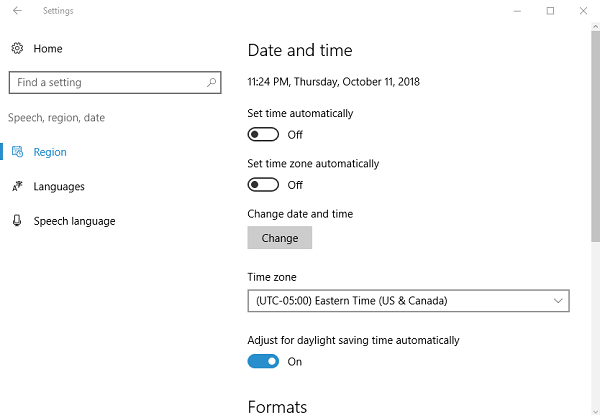
Step 3: Under the option of "Time zone", select the correct time zone from the drop-down menu.
Step 4: Under the option of "Change date and time", click on the "Change" button to open a new dialog box, in which you are able to set the date and time on your own.
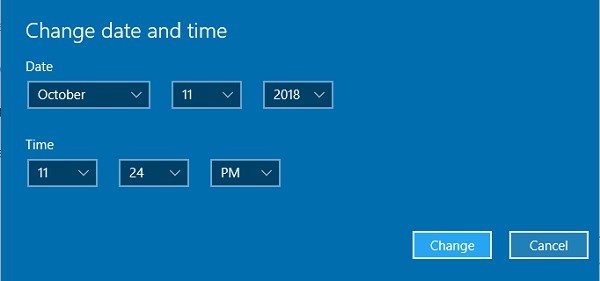
Step 5: Don't forget to click the "Change" button at the bottom right to save the settings.
Windows 10 Cannot Change Time, What to do
When you are trying to change time and date by following the normal steps above, if you receive a pop-up message saying "Unable to continue. You do not have permission to perform this task", you might need to try the following solutions to fix that.
Solution 1
This kind of permission issue in Windows can relate to some corrupted system files. Try to run the system file checker to solve it.
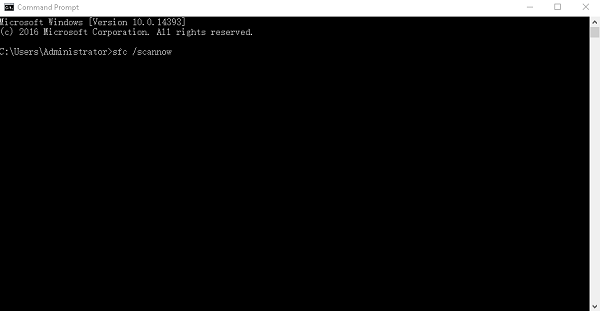
- Open a command prompt as the Administrator.
- Type in the command of "sfc /scannow" and hit the "Enter" key.
- After the system finishes its work, the problem files will be replaced or fixed, go back to settings to change the date and time again.
Solution 2
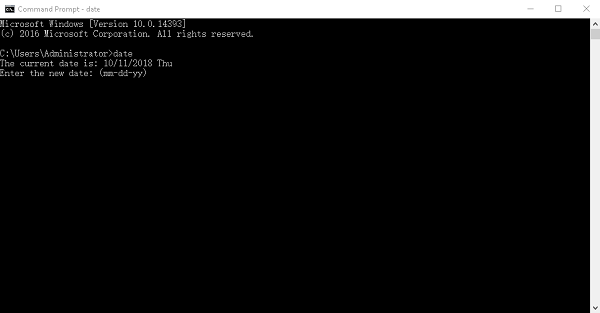
The command prompt mentioned in Solution 1 can also be used to change time and date directly.
- Open a command prompt as the Administrator.
- Type in the word "date" and hit "Enter" key.
- It will show you the current date and you are able to enter the new date.
- The same operation to changing the time: in the command line, type in the word "time" and then enter the new time as the current time.
Solution 3
If you have any problem in running the command line, you can also use Local Security Policy to change time and date.
- Open Control Panel.
- Select Administrative Tools.
- Click on Local Security Policy.
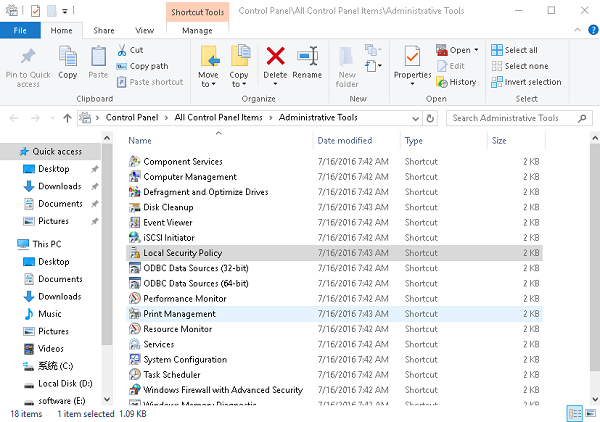
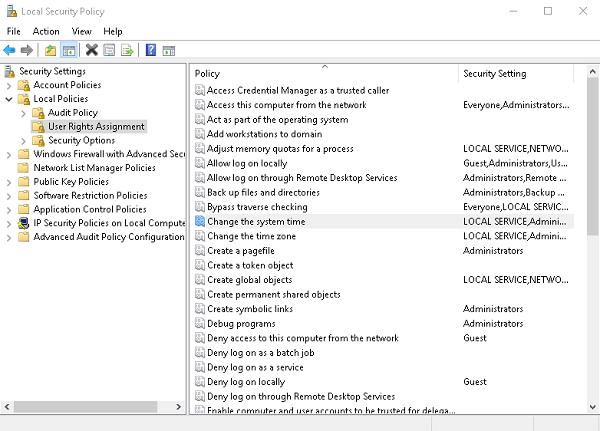
- Choose Local Policies > User Rights Assignment.
- On the right panel, select "Change the system time" and "Change the time zone" to change time and date. (Note that the Administrators should be given the right to operate these two options.)
Solution 4
Another workable method to change time and date on Windows 10 is to use Services in the Control Panel.
- Open Control Panel > Administrative Tools.
- Click on "Services".
- Scroll down to locate "Windows Time". Right click on it and choose "Properties".
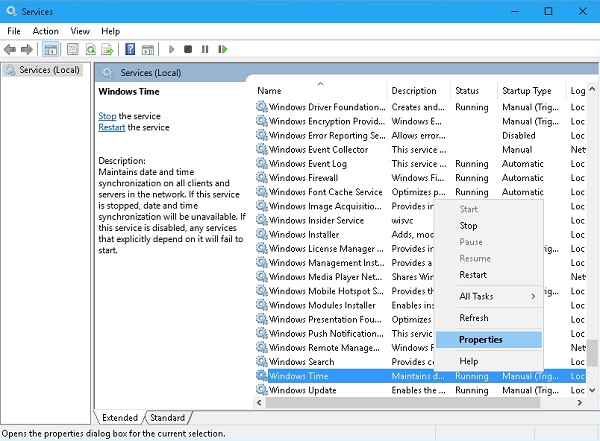
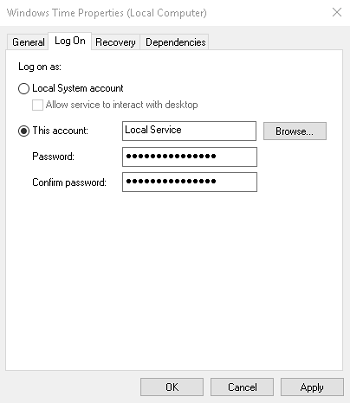
- In the new dialog box, open "Log On" tab.
- Select "This account" and check whether it is filled with "Local Service" in the blank bar. The password boxes should be automatically filled in, so you don't have to type in anything new.
- Click on Application and OK to save the settings. Restart your PC to check whether the time and date are correct.
Hope one of the solutions above help you change the time and date on your Windows 10 successfully. If you feel this how-to post is useful, please share it with your friends! Any comment is welcome.


